R.E.P.O. Unity Project Setup
A guide for setting up your Unity Project to create mods for R.E.P.O.
The Unity workflow is primarily needed for creating Valuables, Shop Items, Enemies, Levels and Cosmetics.
By combining the REPOLib-Sdk Unity Editor package with the core REPOLib DLL, you can build mods entirely without writing code. However, without any coding knowledge, you will be limited on what you can do.
While REPOLib isn't strictly mandatory, it is highly recommended, especially if you are new to R.E.P.O. modding.
For experienced developers, REPOLib is fully extensible, meaning you can still seamlessly integrate your own custom C# scripts alongside it.
OS-SPECIFIC STEPS
Parts of this guide differ between Windows and Linux. Make sure to install and use the correct options for your operating system.
Prerequisites
- Unity Hub: Download and install Unity Hub.
- Unity Editor: Install the Unity Editor version 2022.3.62f3.
- .NET SDK: Required for AssetRipper to run.
- For Windows: Version 9.x
- For Linux: Version 10.x
- Git: Download & Install Git. This is required for installing packages via Git URL in Unity.
Unity Project Setup
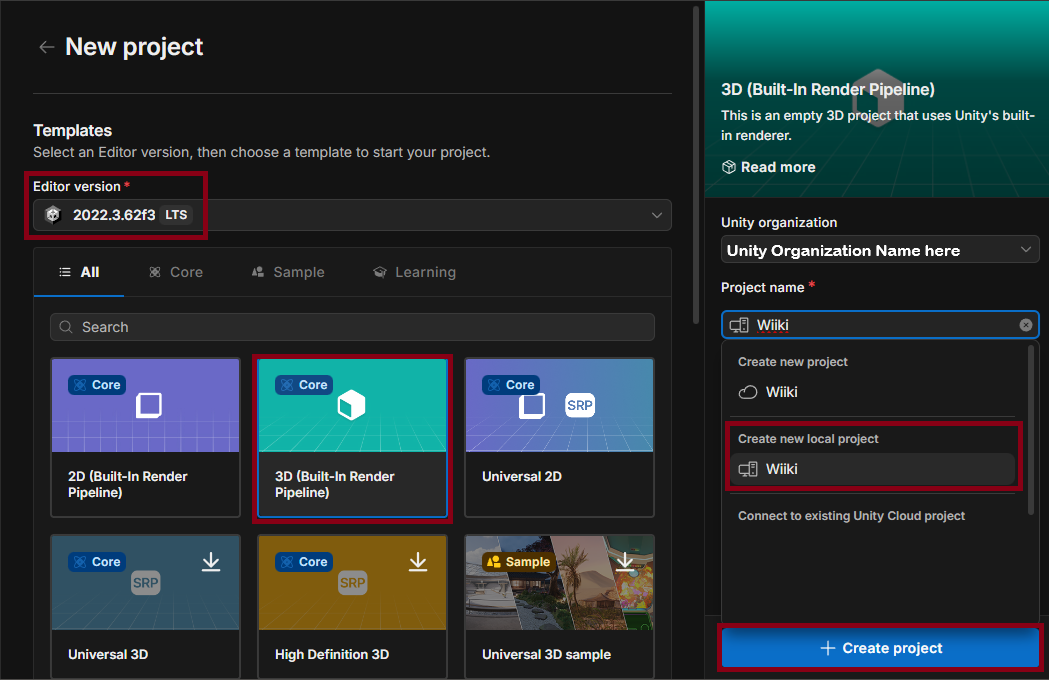
Create a new Unity project with the following configuration (see image below):
- Editor Version:
2022.3.62f3 - Project Location: Local Project
- Template: 3D (Built-In Render Pipeline)
- Editor Version:
Once Unity fully opens, navigate to the menu bar and click
Window > Package Manager.Click the
+button in the top left of the Package Manager and chooseAdd package from git URL...: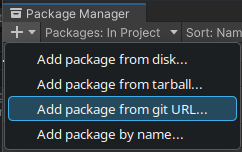
Paste all the following Unity Package links one after another into this text field:

- Unity Project Patcher: Generates a Unity project from a game build so the game can be played in the editor.
bashhttps://github.com/nomnomab/unity-project-patcher.gitbashhttps://github.com/Jettcodey/unity-project-patcher.git- Unity Project Patcher BepInEx: BepInEx handler for a Unity Project Patcher project.
bashhttps://github.com/Kesomannen/unity-project-patcher-bepinex.gitbashhttps://github.com/Jettcodey/unity-project-patcher-bepinex.git- Unity REPO Project Patcher: Game wrapper that generates the Unity project from a R.E.P.O. build for in-editor play.
bashhttps://github.com/ZehsTeam/unity-repo-project-patcher.gitbashhttps://github.com/Jettcodey/unity-repo-project-patcher.git
Patching the Project
After successfully adding the three packages above, navigate to the Unity menu bar and click
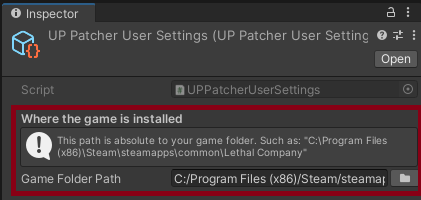
Tools > Unity Project Patcher > Configs > UPPatcherUserSettings:
You will now see new options in the Inspector panel. Leave all the pre-filled fields as they are and only add the games folder path:
Next, return to the menu bar and click
Tools > Unity Project Patcher > Open Window:
In the newly opened
UPPatcher - RepoWrapperwindow, click onEnable BepInExat the bottom of the window and wait for the process to finish.
Once BepInEx is enabled, click
Run Patcherat the Top of the window to begin patching the project: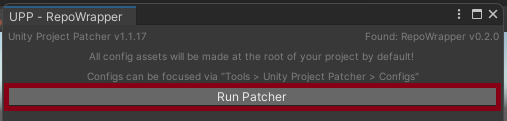
NOTE
This process WILL take a while and will restart the Unity Editor about 4-6 times.
At the very beginning, you will receive 4 Popups. You can safely click
Okon each of them.After the Editor restarts for the final time, a confirmation window will appear indicating the project has been successfully patched. Click
Ok:
Did the Unity Project Patcher fail?
First, check the Unity Console for specific errors and verify that you've installed all Prerequisites.
If everything looks correct, join the R.E.P.O. Modding Server and ask for help in the
#developmentchannel.
You will need to acquire the Modder role from≣ Channels & Roles.
Now that your Unity Project is successfully patched, we recommend adding the REPOLib SDK to your project to make the workflow easier.